We love henna and designed our stencils to be perfect for creating your own henna tattoos. The adhesive backing keeps them from slipping so you don’t end up with any smears. The designs are inspired by traditional symbols we’ve grown up with and a few modern trends thrown in. All this plus our organic henna paste creates professional level henna art that you can create at home. But that’s just the beginning! We’ve found there’s so much more you can do, and we’ve love to hear what you’ve created with your Mihenna stencils. Tag us in your art on Instagram with @mihenna.bodyart
Try Mihenna Stencils with:
Body Art with Mihenna Stencils
The obvious next step for henna stencils is to use them with your favorite body art makeup. Be careful when sticking the stencil on delicate skin and do not stick them around or on your eyes. Once you’ve stuck them, you can create body art with makeup, glitter, or airbrushing. We especially love using body art palettes from our friends at Silly Farm for high-quality and skin-safe makeup.
Crafts with Mihenna Stencils
With the right medium, you can use henna stencils with just about any craft project. Just remember that we use a quality adhesive to reduce slipping, so test first to ensure the stencil will peel off without causing any damage to your project.
Fabrics

We used the Blooms mandala henna stencil to add a little extra pop to a tshirt. To create your own Mihenna shirt, you’ll need:
- 100% Cotton Shirt
- Scissors
- Cardboard
- Fabric Paint (we used Tulip’s Matte Fabric Paint)
First wash and dry the shirt, but do not use fabric softener. Remove the back of your stencil and press the adhesive side where you’d like to add your design.
Pro Tip: We placed the stencil while wearing the shirt to know exactly where the design would fall.
Next place the shirt on a flat surface. Cut a piece of cardboard to size and slide it between the layers to keep the paint from leaking through.
Fill in the stencil with fabric paint. We used our wooden henna spatulas to make sure no part of the design was missed.
Now the tricky part! You need to remove the stencil while the paint is tacky. If the paint is too wet, it will spread and ruin the design. If the paint is too dry, it will rip off with the stencil. A test run on an old piece of cotton fabric can help you get a feel for the bet timing.
Pro Tip: After removing the stencil while the paint is still tacky is the best time to apply rhinestones or charms for a little extra bling!
Keep the shirt flat for 4 hours until the paint is fully dry. Wait 72 hours before washing the shirt again and allow it to air dry. Complete your outfit by checking out more Mihenna apparel. Henna never looked so good.
Home Decor
Henna stencils can help liven up your home too. Anything can become a piece of art! For all the following crafts, we used Sharpie’s Oil-Based Paint Pens and removed the stencil while the paint was still tacky. Follow the directions on your chosen paint and test the stencil before applying it.
Mirror

The lotus design from the Sand henna stencil is too cute. We stuck it in the corner of the mirror, applied two coats of pink paint, and peeled to reveal the most adorable mirror embellishment you ever saw.
Mug
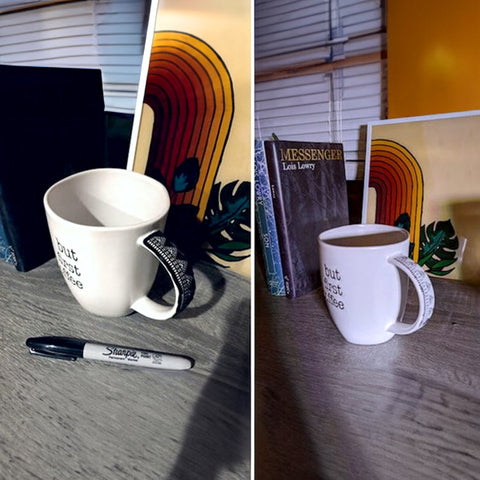
Sharpie paint markers on mugs are so much easier when you don’t have to freehand! We used the ring designs from the Zahra henna stencil to wrap around the handle. After the paint dries, you can set the paint by baking the mug at 350 degrees for 20 minutes.
Candle
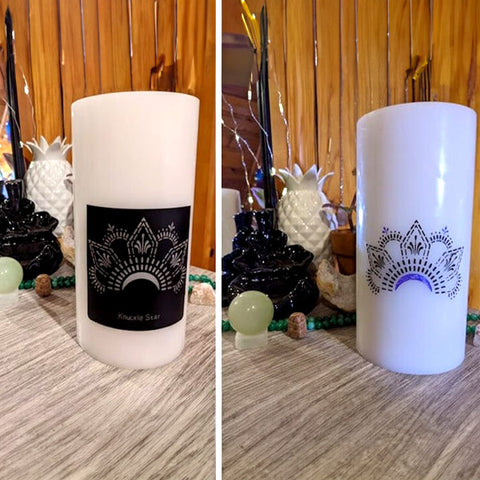
We’re not sure how oil-based paint will hold up on a lit candle yet, but as far as beautifying the space with a little Knuckle Star henna stencil art - it’s a winner.
Canvas
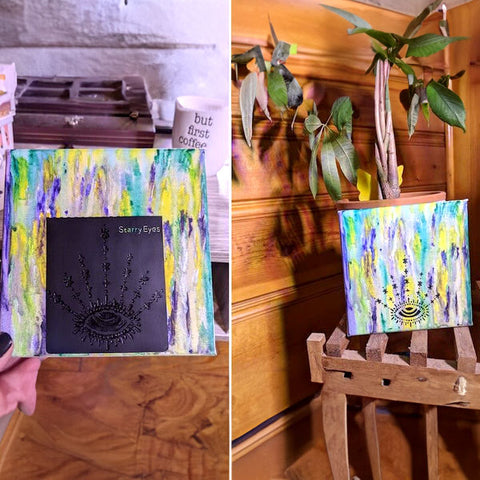
Before we stuck the Starry Eyes henna design on to our watercolor, we peeled the stencil on and off a piece of fabric a few times in order to reduce the adhesiveness. We placed the stencil on top of the dried watercolors and filled it with oil-based paint.